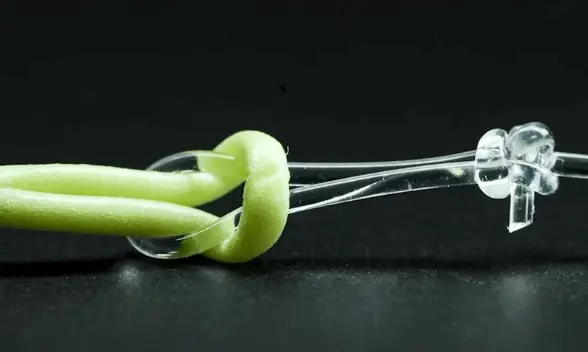
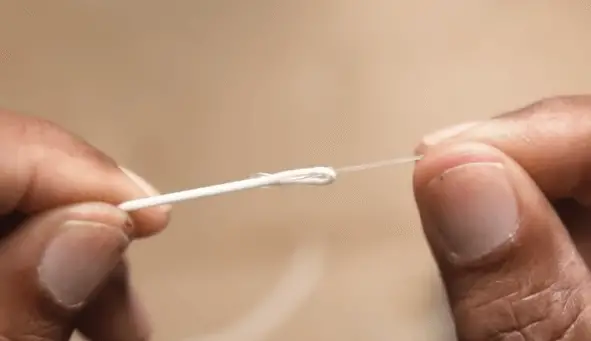
Creating a fly fishing leader is a simple process that involves tapering down the diameter of the leader material for better presentation and turnover of the fly. Here’s a step-by-step guide to making a fly fishing leader –
Make a Fly Fishing Leader
To make a fly fishing leader, you will need to combine a tippet, leader material, and a fly line. It’s important to taper the leader, with the thicker section at the fly line end and the thinner section at the tippet end.
This creates better turnover and presentation when casting. A properly constructed leader helps the fly line and fly to land gently on the water, which is essential for fly fishing success. Leaders can be custom-tailored to suit your fishing conditions, allowing you to achieve better control and accuracy while casting.
By making your own leaders, you can save money and customize them to meet the specific needs of your fishing adventures. Whether you’re a beginner or an experienced angler, creating your own fly fishing leader can improve your overall fishing experience.
Materials for making a fly fishing leader
When it comes to crafting a quality fly fishing leader, selecting the important materials.
This is typically monofilament or fluorocarbon fishing line specifically designed for leaders. Leader material comes in various strengths and diameters, allowing you to create tapered sections for better presentation of your fly.
1. Scissors or Line Clippers: You’ll need a good pair of scissors or line clippers to cut the leader material to the desired lengths.
2. Leader Straightener (optional): A leader straightener can be helpful for removing memory coils or curls from the leader material, ensuring a smooth presentation.
3. Leader Tying Kit (optional): While not essential, a leader tying kit may include tools like a leader gauge, leader straightener, and instructions for tying different knots to join leader sections.
4. Tippet Material: Tippet material is a finer diameter line attached to the end of the leader, allowing you to extend the life of your leader by replacing the tippet when it gets worn or damaged. Tippet material typically comes in spools of various strengths and diameters.
5. Tippet Rings : Some anglers like to use tippet rings, small metal rings that are tied onto the leader to make it easier to attach tippet material.
6. Fly Line: While not directly part of making the leader, you’ll need a fly line to which you’ll attach the leader. The type of fly line you use will depend on the fishing conditions and the species you’re targeting.
Creating The Basic Leader
Learn how to craft your own fly fishing leader step-by-step with basic materials. Create a durable leader for optimal fishing performance. Master the art of tying knots and connecting lines for a successful fishing experience.
Creating the Basic Leader When it comes to fly fishing, having the right leader is essential for success. A well-made leader ensures that your line and fly are presented in a natural and effective way. In this guide, we will walk you through the process of creating a basic leader for fly fishing. We will cover everything from cutting the leader material to attaching the tippet and adding a tippet ring. So, let’s get started!
1. Cutting The Leader Material
The first step in creating a basic leader is to cut the leader material to the desired length. Typically, a leader is about 7.5 to 9 feet long, although you can adjust it based on your personal preference and fishing conditions. To cut the leader material, use a sharp pair of scissors and trim it to the desired length.
2. Attaching The Tippet
Next, you’ll want to attach the tippet to the end of the leader material. The tippet is the final section of the leader that attaches to your fly. To attach the tippet, take the end of the leader material and tie it to the tippet using a blood knot or surgeon’s knot. Make sure to wet the knots before tightening them to ensure a secure connection.
3. Adding A Tippet Ring
If you want to make it easier to change your tippet, you can add a tippet ring to your leader. A tippet ring is a small metal ring that you can attach between the leader and the tippet. To add a tippet ring, slide the ring onto the leader material before attaching the tippet. This will allow you to easily connect and disconnect different tippets without having to cut and retie your leader every time. In conclusion, creating a basic leader for fly fishing involves cutting the leader material to the desired length, attaching the tippet, and optionally adding a tippet ring. By following these steps, you’ll be able to create a high-quality leader that will improve your fly fishing experience. So go ahead, give it a try, and get ready to reel in those fish!
Building A Tapered Leader
Fly fishing requires precision and delicacy, especially when it comes to building a tapered leader. A tapered leader is an essential component of the fly fishing setup, providing a smooth transition of energy from the fly line to the fly, allowing for accurate and subtle presentations. In this guide, we will walk you through the process of building a tapered leader, including determining the length of each section and attaching the sections together.
Determining The Length Of Each Section
The first step in building a tapered leader is determining the length of each section. This involves creating a taper that transitions from the thick butt section to the finer tippet section. The general rule of thumb is to divide the leader into three sections – the butt section, the midsection, and the tippet section. The lengths of these sections can vary based on the fishing conditions, the size of the fly, and the species being targeted.
Attaching The Sections Together
Once you have determined the lengths of each section, it’s time to attach them together. This can be done using a variety of knots, such as the blood knot or the surgeon’s knot. Each knot should be carefully tied, ensuring that the connection between the sections is strong and smooth, allowing for effective transfer of energy during the cast.
Adding Strength And Durability
When it comes to fly fishing, the strength and durability of your leader are crucial for a successful and enjoyable fishing experience. Adding strength and durability to your fly fishing leader involves using secure connections and applying the appropriate formulas for the leader length and taper. By following these techniques, you can ensure that your fishing leader can withstand the challenges posed by different water conditions and the pull of the fish.
Using Knots For Secure Connections
The connections in your fly fishing leader are essential for maintaining the overall strength and durability. Utilizing strong and reliable knots is key to ensuring that the leader remains intact during the intense activity of fishing. The improved clinch knot, blood knot, and surgeon’s knot are popular choices for connecting leader segments, providing the necessary strength to withstand the force of casting and playing a fish.
Applying Fly Fishing Leader Formulas
When constructing a fly fishing leader, adhering to the appropriate formulas is vital for achieving the desired strength and durability. Utilizing the 60/20/20 formula for the leader’s length and taper is a common practice that results in a well-balanced and efficient leader. This formula ensures the leader possesses the necessary strength to turn over the fly accurately while maintaining enough flexibility to effectively present the fly to the fish.
Final Touch
With a few simple steps and the right materials, you can craft your own leader and enhance your overall fishing experience. Remember, the length and strength of the leader will depend on your fishing conditions and target species.


