
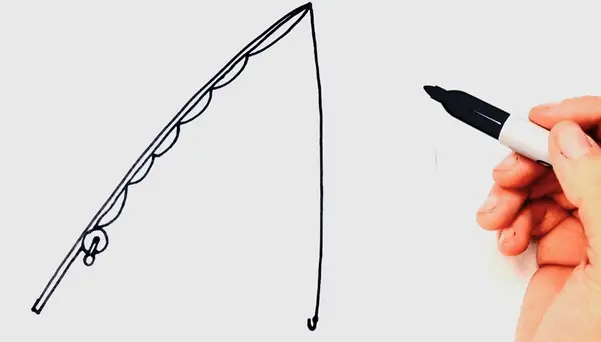
To draw a fishing rod step by step, follow these instructions carefully.
Choosing The Right Materials
One of the most important aspects of drawing a fishing rod is selecting the right materials. The quality and suitability of the materials you choose can greatly impact the performance and durability of your fishing rod. In this section, we will walk you through the process of selecting the rod blank, choosing the reel seat and grip, and picking the guide and tip top.
Selecting The Rod Blank
The rod blank is the main shaft of the fishing rod, and it plays a crucial role in determining the rod’s strength, flexibility, and sensitivity. When selecting a rod blank, there are a few key factors to consider:
- Length: Choose a length that suits the type of fishing you intend to do. Longer rods are typically better for casting distance, while shorter rods offer more precision in tight spaces.
- Action: The action of a fishing rod refers to how much the rod bends under pressure. Fast action rods bend mostly at the tip, making them ideal for casting and fighting big fish. Medium action rods bend in the middle, providing a good balance between casting performance and fish-fighting ability. Slow action rods bend throughout their length, providing a more forgiving and delicate presentation.
- Power: The power of a fishing rod refers to its lifting strength. Choose a power that matches the target species and fishing conditions you will encounter. Light power rods are suitable for small fish and light tackle, while heavy power rods are designed for big game fishing.
- Material: Fishing rod blanks are commonly made from graphite, fiberglass, or a combination of both. Graphite rods are lightweight, sensitive, and have a fast action, making them ideal for many fishing techniques. Fiberglass rods are more durable, flexible, and have a slower action, making them great for heavy-duty applications.
Choosing The Reel Seat And Grip
The reel seat and grip are critical components of a fishing rod as they provide comfort, control, and stability during fishing. Consider the following factors when choosing the reel seat and grip:
- Material: Reel seats are commonly made of graphite, aluminum, or stainless steel. Each material has its own pros and cons, so choose one that suits your preferences and budget. Grips are typically made of EVA foam or cork, with EVA foam offering better durability and grip even when wet.
- Size and Shape: Ensure that the reel seat and grip are the right size and shape for your hand. A comfortable grip will reduce hand fatigue and enhance your fishing experience.
- Thread Wraps: Some anglers like to add thread wraps to the reel seat and grip for extra grip and a personalized touch. Consider choosing thread wraps that match your rod’s color scheme or aesthetics.
Picking The Guide And Tip Top
The guide and tip top of a fishing rod play a crucial role in controlling the line during casting and retrieval. Here are a few considerations when selecting the guide and tip top:
- Material: Guides and tip tops are commonly made of stainless steel, ceramic, or a combination of both. Stainless steel guides are durable and abrasion-resistant, while ceramic guides offer smoother line flow and reduce friction.
- Frame: Guides can have either a single-foot or double-foot frame. Single-foot guides are lighter and more flexible, while double-foot guides provide extra strength and stability.
- Size: Different fishing lines require different guide sizes. Match the guide size to the diameter of your fishing line for optimal performance.
In conclusion, choosing the right materials for your fishing rod is essential for achieving the desired performance and durability. Consider the length, action, power, and material of the rod blank, the material, size, and shape of the reel seat and grip, as well as the material, frame, and size of the guide and tip top. Taking the time to make educated choices in these areas will greatly enhance your fishing experience.
Draw a fishing rod step by step
Assembling The Rod
Learn how to assemble a fishing rod step by step with this easy-to-follow guide. From attaching the reel to securing the fishing line, you’ll be ready for your next fishing adventure in no time.
Attaching The Reel Seat
To start assembling your fishing rod, you will first need to attach the reel seat. The reel seat is the part of the rod where you will attach your fishing reel. To do this, follow these simple steps:
- First, locate the reel seat on your fishing rod. It is usually located towards the bottom end of the rod.
- Slide the reel seat over the rod’s handle until it reaches the desired position, which is typically around 14 to 16 inches from the rod’s butt.
- Once in position, tighten the reel seat by turning it clockwise. This will secure it firmly onto the rod.
Installing The Grip And Foregrip
After attaching the reel seat, it’s time to install the grip and foregrip. The grip is the part of the rod that you hold while fishing, providing comfort and stability. The foregrip, on the other hand, is located above the reel seat and acts as a support for your hand. Here’s how you can install them:
- Start by sliding the grip onto the rod handle. Ensure that it is pushed all the way down until it reaches the reel seat.
- Next, insert the foregrip onto the rod, directly above the reel seat. Push it down firmly until it is snugly in place.
- Once both the grip and foregrip are in position, give them a gentle twist to make sure they are secure and won’t rotate during use.
Mounting The Guide And Tip Top
The final step in assembling your fishing rod is to mount the guide and tip top. The guide, typically made of metal or ceramic, is the small ring located along the rod’s length that helps to guide the fishing line. The tip top is the final guide located at the very tip of the rod. Here’s how to mount them:
- Starting from the bottom of the rod, begin attaching the guides one by one. Align each guide with the rod, ensuring that the line will pass through smoothly.
- Once all the guides are in place, check that they are evenly spaced along the rod’s length. This will ensure proper line distribution during casting.
- Finally, attach the tip top to the very end of the rod. Make sure it is securely fastened, as it will be in direct contact with the fishing line.
Preparing The Blank
Preparing the blank of your fishing rod is a crucial step to ensure the performance and longevity of your fishing equipment. In this section, we will guide you on how to clean, sand, and wrap the guides on the fishing rod blank. By following these steps, you can make sure that your fishing rod is ready for the next angling adventure!
Cleaning And Sanding The Blank
Before you start wrapping the guides on your fishing rod blank, it’s essential to clean and prepare the surface. Follow these simple steps to ensure a smooth and durable finish:
- Gently wipe the blank with a clean, lint-free cloth to remove any dust, dirt, or debris.
- If there are stubborn stains or residues, you can use a mild soap solution and a soft brush to gently scrub the surface. Rinse thoroughly to remove any soap residue.
- Once the blank is clean, allow it to dry completely before proceeding.
- Next, you need to sand the blank to create a smooth surface for the guide wraps. Start with a fine-grit sandpaper (around 220-grit) and sand the entire length of the blank, applying light pressure in a back-and-forth motion.
- Take your time and be thorough, ensuring that the entire surface is evenly sanded. This step helps remove any rough spots or imperfections that could affect the performance of your fishing rod.
- After sanding, use a clean cloth to wipe away any sanding dust, ensuring that the surface is free from debris.
Wrapping The Guides On The Blank
Now that your fishing rod blank is clean and prepared, it’s time to wrap the guides. Follow these steps to ensure proper guide placement and secure wraps:
- Gather all the guides you will be using for your fishing rod. Lay them out in the desired positions along the blank, taking note of the spacing between each guide.
- Using a guide placement template or a marking tape, mark the exact positions where each guide should be wrapped.
- Prepare the guide wraps by cutting a length of fishing rod thread or thread wrap to fit the distance between the marked positions.
- Secure one end of the thread to the blank using a small piece of tape or a rubber band to prevent it from unraveling.
- Wrap the thread tightly around the blank, crossing over the guide foot and the thread end at the starting position.
- Continue wrapping the thread smoothly and evenly towards the ending position, making sure there are no gaps or overlaps in the wraps.
- Once you reach the ending position, secure the thread with a small piece of tape or a drop of glue to prevent it from unraveling.
- Repeat this process for each guide, ensuring consistent spacing and tight wraps.
- After wrapping all the guides, trim any excess thread and neatly secure the loose ends.
Wrapping And Finishing The Guides
Now that you have successfully attached the guides to your fishing rod, it’s time to move on to the next crucial step in the process – wrapping and finishing the guides. This step not only adds strength and durability to your rod but also enhances its aesthetic appeal. In this guide, we will walk you through two important sub-steps: applying thread wraps and coating the wraps with finish.
Applying Thread Wraps
Thread wraps play a vital role in holding the guides firmly in place on your fishing rod. By using a strong, specialized thread and applying it carefully, you ensure that the guides won’t shift or loosen during your fishing adventures. Follow these steps to apply thread wraps effectively:
- Prepare your thread: Start by selecting a high-quality thread that matches the color scheme you desire. Cut a length of thread, around four to six inches longer than the distance you need to wrap. This extra length will allow you to secure it properly.
- Secure the thread: Start by wrapping the thread around the base of the guide foot, making sure it is tight and secure. Use your fingers or a small clip to hold the working end in place temporarily.
- Begin wrapping: With the working end secure, start wrapping the thread tightly around the guide foot and the rod blank. Overlap each wrap slightly to ensure a solid and uniform coverage. Continue wrapping until you reach the desired length or the thread’s end.
- Secure the wraps: Once you’ve reached the end of your wraps, carefully trim the excess thread, leaving a small tail. Hold the tail with one hand and use your other hand to apply a small amount of finish over the wraps. This will secure the wraps in place and prevent them from unraveling.
Coating The Wraps With Finish
Now that you have successfully applied the thread wraps, it’s time to give them a protective coating of finish. This step ensures that the wraps remain in place, provides additional strength, and enhances the overall appearance of your fishing rod. Follow these steps to coat the wraps:
- Prepare the finish: Choose a suitable finish for your rod, such as epoxy or varnish. Make sure to read and follow the manufacturer’s instructions for the best results.
- Apply the finish: Dip a small brush or use a syringe to carefully apply the finish over the thread wraps. Start from the guide foot and work your way towards the rod blank, ensuring even coverage. Be cautious not to apply too much finish as it can lead to drips or uneven drying.
- Remove excess finish: After applying the finish, use a clean and dry brush to remove any excess and smooth out the surface. Pay attention to the guide foot and any areas where drips may have formed.
- Cure the finish: Follow the instructions provided by the manufacturer to allow the finish to cure properly. This process usually involves leaving the rod to dry for a specific amount of time in a dust-free and well-ventilated area.
By following these steps and being patient throughout the process, you will achieve professional-looking thread wraps and a durable finish that not only protects your fishing rod guides but also adds a touch of personalization. Once the finish has properly cured, you’ll be one step closer to enjoying your newly crafted fishing rod on your next angling expedition!
Testing And Finalizing
Discover how to draw a fishing rod step by step with our easy-to-follow guide. From selecting the right materials to testing and finalizing your creation, you’ll be ready to cast off and enjoy a day on the water in no time.
Checking The Guide Alignment
Before testing the flexibility and balance of your fishing rod, it’s important to first check the guide alignment. Proper guide alignment ensures that the line runs smoothly through your rod and reduces the risk of tangles or snags during casting. To check the guide alignment, follow these steps:
- Hold the rod horizontally at eye level and look down the rod towards the tip.
- Make sure that all the guides are aligned with each other in a straight line.
- If you notice any misalignment, gently adjust the guides until they are all perfectly aligned.
Having properly aligned guides is crucial for optimal performance when you’re out on the water. It allows the line to flow smoothly and accurately, improving your overall fishing experience.
Testing The Flexibility And Balance
The next step in finalizing your fishing rod is to test its flexibility and balance. This ensures that the rod performs effectively and is comfortable to use. Here’s how you can test the flexibility and balance of your fishing rod:
- Hold the rod with a firm grip, using your dominant hand.
- Slowly flex the rod by applying pressure to the tip, without exerting excessive force.
- The rod should bend smoothly and evenly throughout its length, without any uneven or stiff spots.
- Additionally, check the rod’s balance by placing your hand in the middle of the rod and seeing if it rests evenly without tipping to one side.
Testing the flexibility and balance of your fishing rod ensures that it will perform well in various fishing conditions and provides a comfortable experience during those long hours on the water.
Finalizing With Rod Finish
Once you’re satisfied with the guide alignment, flexibility, and balance of your fishing rod, it’s time to finalize it with a rod finish. Applying a rod finish not only enhances the rod’s appearance but also protects it from wear and tear caused by exposure to water, sunlight, and other environmental factors. Follow these steps to apply a rod finish:
- Prepare the rod finish according to the manufacturer’s instructions.
- Use a small brush or applicator to carefully apply the rod finish onto the rod’s blank, starting from the butt section and working your way towards the tip.
- Ensure an even and smooth application, avoiding excessive drips or clumps.
- Allow the rod finish to dry completely, following the recommended drying time provided by the manufacturer.
Applying a rod finish adds a protective layer to your fishing rod, ensuring its durability and longevity. It’s an important final step in the process of drawing your fishing rod.
Last Word
Drawing a fishing rod can be a fun and rewarding activity for both beginners and experienced artists. By following the step-by-step guide provided in this blog post, you can master the art of drawing a fishing rod in no time.
Remember to practice regularly and have patience. With dedication and perseverance, you can refine your skills and create impressive drawings of fishing rods. So grab your pencil and paper, and let your creativity flow as you embark on this artistic journey.
Happy drawing!