
To make homemade fishing bobbers, you need a small cork and a long sewing needle.There are many types of fishing bobbers and home made bobber is one of them. In this article we share step by step process to make homemade fishing bobbers.
Gathering Materials
Before you dive into making your own homemade fishing bobbers, it’s important to gather all the necessary materials. The right materials and tools will ensure that your fishing bobbers are not only functional but also durable. In this section, we will discuss how to select the right materials and gather the necessary tools and supplies before you start creating your homemade fishing bobbers.
Selecting The Right Materials
When it comes to selecting the right materials for your homemade fishing bobbers, you’ll want to consider a few key factors. First and foremost, you’ll need a floating material that is lightweight and buoyant. Materials such as foam sheets, balsa wood, or even empty plastic bottles can work well for this purpose. These materials will keep your bobber floating steadily on the water’s surface.
Next, you’ll need a sturdy and durable material for the body of your bobber. This is where materials like cork, small plastic orbs, or even pencil erasers can come in handy. These materials will provide the necessary weight and stability to keep your bobber upright when in use.
Lastly, you’ll need a material for attaching the fishing line to your bobber. Choosing a strong material that is resistant to water damage is crucial. Fishing line, nylon thread, or dental floss can all be viable options for this purpose. Be sure to select a material that will securely hold the fishing line and withstand the elements.
Gathering Tools And Supplies
In addition to the materials mentioned above, you’ll need a few tools and supplies to bring your homemade fishing bobbers to life. The following list outlines the essentials:
- Scissors or craft knife: These are necessary for cutting and shaping the materials you have selected for your bobbers.
- Glue or adhesive: This will be used to attach the floating material to the body of the bobber, ensuring a secure connection.
- Drill or awl: If you are using wood or cork for the body of your bobbers, you will need a drill or awl to create a hole for the fishing line attachment.
- Paint or markers: If you’d like to personalize your homemade fishing bobbers, consider using paint or markers to add colors and patterns.
- Clear spray sealant: To protect your homemade fishing bobbers from water damage and extend their lifespan, consider using a clear spray sealant.
By gathering these tools and supplies, you’ll be well-prepared to create your very own homemade fishing bobbers. With the right materials and tools in hand, you’re one step closer to enjoying a successful fishing trip with your custom-made bobbers.
Preparing The Materials
To make homemade fishing bobbers, start by gathering the necessary materials such as small foam balls, toothpicks, and bright-colored paint. Once you have the materials ready, you can follow the step-by-step instructions to craft your own customized fishing bobbers. This process allows for personalization and saves money compared to store-bought options.
Before you begin making your own homemade fishing bobbers, it’s essential to gather and prepare the necessary materials. This step involves cutting the corks and prepping the dowels. By ensuring that your materials are properly prepared, you’ll be ready to create functional and effective fishing bobbers. Let’s take a closer look at each of these tasks.
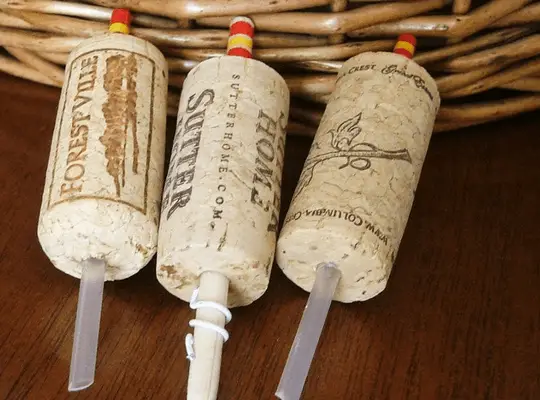
Cutting The Corks
To start, gather a few corks of suitable thickness for your fishing bobbers. Using a sharp knife or a cork cutter, carefully and evenly cut the corks into small slices. These slices will serve as the main body of your bobbers. Aim to make each slice around half an inch in thickness, allowing them to float effortlessly on the water’s surface.
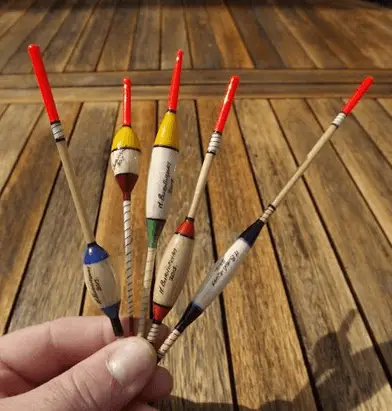
Prepping The Dowels
Next, you’ll need to prep the dowels that will serve as the stems for your homemade bobbers. Start by selecting dowels of the appropriate length to ensure that your bobbers will be easily visible in the water. Using sandpaper, gently smooth the ends and any rough surfaces. This step is crucial as it ensures that the dowels won’t snag and can easily attach to the corks. Once the dowels are smooth, create a small groove at the top of each one. This groove will provide a secure spot to attach your fishing line. Be sure to make the groove deep enough to hold the line firmly in place but without compromising the structural integrity of the dowel. With the corks cut and the dowels prepped, you’re now well-prepared to proceed with assembling your homemade fishing bobbers. The materials are ready, and it’s time to move on to the next step – Creating the Bobbers. Stay tuned for our upcoming blog post to learn more about crafting your own fishing bobbers from scratch!
Assembling The Fishing Bobbers
Now that you have gathered the necessary materials and prepared the corks and dowels, it’s time to assemble your homemade fishing bobbers. This step-by-step guide will walk you through the process to ensure a successful result.
Attaching The Corks And Dowels
Start by aligning the pre-drilled hole on the cork with the hole on the dowel. Make sure they fit snugly together. If needed, sand the edges of the dowel or enlarge the hole in the cork slightly to achieve a perfect fit.
Next, apply a small amount of waterproof glue to the hole in the cork and insert one end of the dowel into it. Press down firmly to ensure a secure attachment. Allow the glue to dry completely before proceeding.
Repeat this process for each fishing bobber you are assembling, ensuring a tight bond between the cork and dowel. Double-check that all components are firmly attached.
Adding The Finishing Touches
Once the cork and dowel are securely attached, it’s time to add the finishing touches to your homemade fishing bobbers. This involves painting the exterior of the bobber to increase visibility and make it more attractive to fish.
Choose a high-visibility color of waterproof paint. Using a small brush, carefully apply an even coat of paint to the exposed surfaces of the cork and dowel. Allow the paint to dry completely.
For added visibility and attractiveness, you can also attach some reflective tape or adhesive fish-scale pattern stickers to your fishing bobbers. These will catch the light and make your bobbers stand out even more.
Once the paint and additional decorations are fully dried, your homemade fishing bobbers are ready to hit the water. Attach the bobbers to your fishing line and start enjoying the thrill of fishing with your own custom-made gear!
Customizing Your Bobbers
Learn how to customize your homemade fishing bobbers with these simple tips. Create personalized bobbers that will enhance your fishing experience and help you catch more fish. Get creative and make your own unique bobbers that stand out on the water.
Painting And Decorating Options
You can take your homemade fishing bobbers to the next level by adding a splash of color or some creative designs. Painting your bobbers not only makes them visually appealing but also helps you easily spot them in the water. To get started, gather some acrylic paint in your favorite hues and use a small brush to carefully apply the paint to the surface of your bobber. Allow the paint to dry completely before using your bobbers. You can create fun patterns, add stripes, or even experiment with more intricate designs by using stencils or tape to create clean lines. Let your creativity shine and make your bobbers truly unique!
Personalizing With Names Or Initials
Why not make your homemade fishing bobbers even more special by personalizing them with names or initials? This not only adds a touch of personalization but also helps differentiate your bobbers from those of your fishing buddies. One easy way to achieve this is by using permanent markers or paint pens to write your name or initials on the bobber. Another option is to purchase alphabet stickers or decals and apply them to your bobbers. Whether it’s your own name, your fishing partner’s initials, or even your favorite fishing spot’s name, adding a personal touch will make your bobbers stand out and add a sentimental value to your fishing experience.
Testing And Using Your Homemade Bobbers
After creating your homemade fishing bobbers, it’s essential to ensure they perform as intended and are suitable for various fishing scenarios. Testing and using your homemade bobbers will give you the confidence to rely on them during your fishing trips.
Performing The Buoyancy Test
To verify the buoyancy of your homemade bobbers, fill a container with water. Carefully place each bobber into the water and observe its floating ability. Bobbers that float upright and remain stable indicate reliable buoyancy, ensuring they will perform effectively in real fishing situations.
Using Your Bobbers In Fishing Scenarios
When using your homemade bobbers for fishing, consider the specific conditions and target species. Different bobber sizes and colors may be suitable for various fishing scenarios. For example, larger bobbers are ideal for rough waters, while smaller ones work well in calm environments. Bright-colored bobbers can enhance visibility for certain fish species, increasing your chances of a successful catch.
Last Word
In a few easy steps, you can create your own homemade fishing bobbers. By using simple materials and following this DIY guide, you’ll not only save money but also experience the satisfaction of using your personally crafted bobbers on your next fishing trip.
Whether you’re a beginner or a seasoned angler, making your own fishing bobbers is a unique and rewarding way to enhance your fishing experience. So, why not give it a try and take your fishing skills to the next level?
Happy fishing!